 EN
EN NL
NL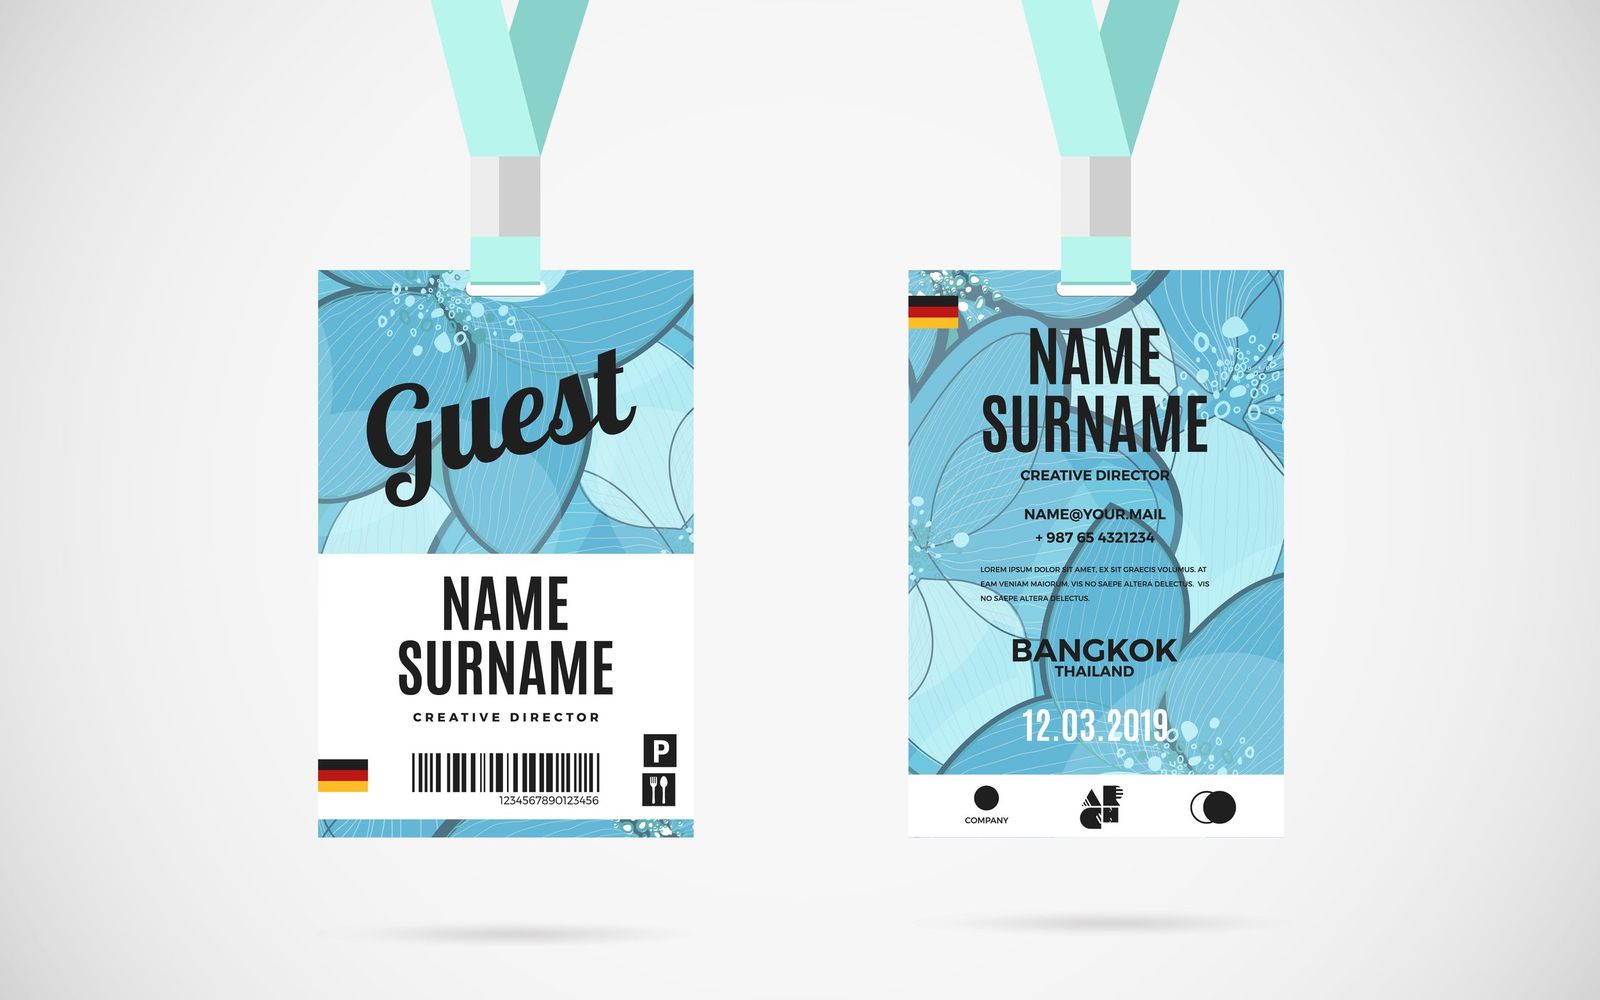
Redefining Event Badge Management with Innovative Features
When it comes to events, providing attendees with a well-designed badge is not only courteous but also sets the tone for a memorable experience.
However, there's always room to take things a step further. Imagine making life easier for your guests by:
- Sharing contact information through a QR code,
- Printing the (personalized) event schedule directly on the badge.
And as for the rest? Well, that's where the creativity of your team comes into play.
For Whom?
This blog post caters to designers (for template preparation) and managers (2i platform configuration).
Selecting the Perfect Paper
Event badges are often printed on pre-perforated paper. What type of paper are you using? Make sure to record all dimensions:
- Width and height of the badge in mm: the designer will need this for creating the template,
- All margins in mm: users will input these details in the 2imagine workflow.
Preparing the Template
Offline, create a template using InDesign. Assuming your event badges measure 90mm x 50mm and you want to print on both sides.
The final result should be an A4 with two grouped objects of 90mm x 50mm each:
- Grouped front objects labeled "CARD",
- Grouped back objects labeled "CARDBACK",
- The image object for the QR code labeled "QRCONTACT",
- Any dynamically adjustable images should have a unique script label,
- Replace any text you want to be dynamically adjustable with a unique <?tag?>.
Note: Each <?tag?> must exactly match a column name in the Excel file.
Save your InDesign file and upload it into 2imagine under a template group associated with the "Event Cards Workflow."
Tip: Begin with our sample template and customize the design to match your brand identity.
Preparing Excel and CSV
This task can be undertaken by the administrator, manager, or designer. It's essential to collaborate with your designer since the <?tag?> fields in InDesign must correspond to column names in Excel. Even a typo can lead to redoing your work.
Tip: Start from our sample file and add columns if needed.
Column Names

- Column 1 contains the fixed column name "QRCONTACT" along with a formula. Do not alter or remove this column! Ensure the formula is present in each data row (copy/paste).
- Columns 2-5 include the fixed column names "VOORNAAM" (first name), "NAAM" (last name), "MAIL" (email), "BEDRIJF" (company). Do not alter or remove these columns. Leave a column blank if not in use.
- Additional columns can be added freely as long as the column name matches a <?tag?> name in the template you intend to use.
Dynamic Content (Text, Images, QR Contact Information)
Each <?tag?> in your template can be dynamically replaced with content from your Excel file:
- Text: Enter the desired text in the cell,
- Image: Enter the URL to the image in the cell (the URL must be accessible to 2imagine),
- QRCONTACT: The QR code is automatically generated using the formula in column 1.
Need a Different QR Code?
If you wish to use a QR code for something other than contact information (e.g., a link to an event registration page), please reach out to our support team. A different formula is required in the Excel file for this.
Saving as a CSV File
Save your Excel file as CSV in UTF-8 format.
Creating Your Event Badges
- Log in to 2imagine,
- Select the template for your event badges,
- Create a new document, initiating the workflow,
- Enter the necessary dimensions in the form (margins, badge height, and width),
- Upload your CSV file,
- ... wait a moment,
- Download the PDF.
Printing
The example template we provide is designed for recto/verso (front/back) printing. If your printer doesn't support this, follow these steps:
- Print all odd pages,
- Flip the pages and arrange them in the correct order,
- Load the pages back into the printer,
- Print all even pages.
Always conduct a small test. Not all printers work the same way or in the same order.


